Beauty

 Healthy, Homemade, Aluminum-Free Deodorant

1/4 cup baking soda

1/4 cup arrowroot powder or cornstarch (arrowroot preferred)

Combine equal portions of baking soda and arrowroot powder or cornstarch.

I spray on “naturally fresh” deoderant (just mineral salts and water…(you can buy at whole foods) to get my arm pit wet, and then use the “naturally fresh” roll on deoderant and coat with the baking soda / arrowroot powder.

This keeps me smell free for about 24 hours!  You can also use your fingers or just water to apply the baking soda / arrowroot.


Makeup

I use Mineral Fusion for my make up.  You can buy it online, at Sprouts or Whole Foods.

This line is much less toxic than other makeup lines.


Anti-Aging and discoloration Product

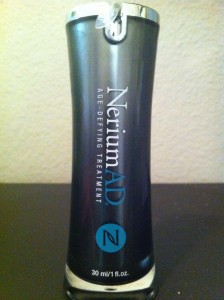
photo (82)

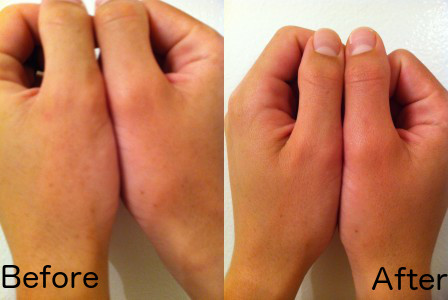
I have been using this face cream (Nerium) for 6 months now and absolutely love it.  My face, neck and hands are smoother and my pores are smaller.  I had sun spots on my hands and this removed them in 5 days.  It is all natural with no parabens and has extensive research behind it.   There is also 30 day money back guarantee.   To find out more you can email me at rbomgaarsdc@gmail.com or click here.

Go to Results and watch the “Reflect Your Youth” Video.

These are my hands after 5 days.  Ask me through email or at your appointment if you’d like to try a 5 day sample too!

BeforeAfterHands

Neck Pain or Tightness? Try these stretches…

Scalene stretch (middle, front (anterior) and back (posterior) scalene)                                                       

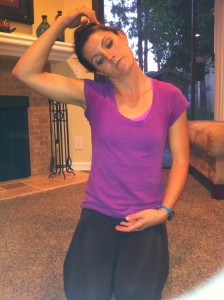
Part 1: Sit or stand tall, bring right ear to right shoulder, use your right hand to provide a little more pressure, touching the right temple.  Hold for 20-30 seconds, then switch.  Perform 3 times on each side (Stretches the middle scalene)

Middle scalene

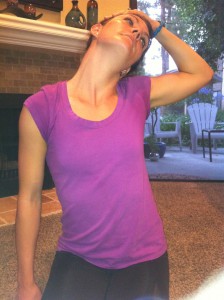
Part 2) Sit tall and bring your left ear to your left shoulder blade.  Place your left hand on the right side of your forehead to provide a deeper stretch.  Hold 20-30 seconds, then switch sides. (stretches the front (anterior) scalene)

Anterior scalene

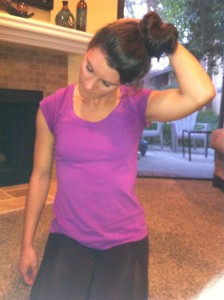
Part 3) Sit tall, bring your left ear to the front of your right shoulder and look down, place your left hand on the back of the left side of your head and pull gently until you feel a stretch.  Hold 20-30 seconds and switch to the opposite side.  Perform 3x each side. (Back (posterior) scalene)

Posterior scalene

Sciatica? This Stretch May Help

Piriformis stretch

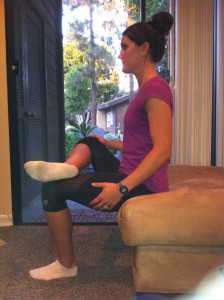
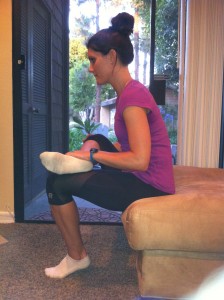
While seated, cross one leg over the other so your heel is on the thigh of the opposite leg, with the foot on the floor, lift your heel so you’re on your toes and lean forward, keep your back tall and straight, chest to toe of the “up” leg.  Hold for 20-30 seconds, perform 3 times.

Beginning of Piriformis stretch Piriformis stretch


At Home Stretches

4 Way Leg Stretch

Dynamic (keep moving) before activity or in the morning ~10x moving in place or walking

Static (hold) after activity or in the evening 3x30s or 2 min. for tightest spots

Back (hamstrings) Keep back flat, chest towards your knees

Hamstringhamstring 2

Hamstrings with toe up, chest towards toe

Hamstring3

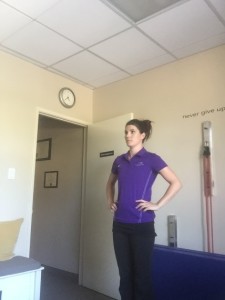
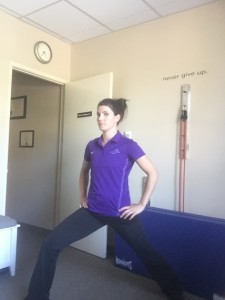
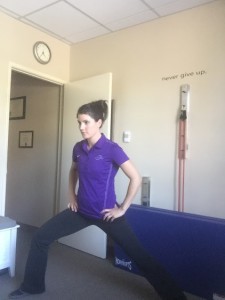
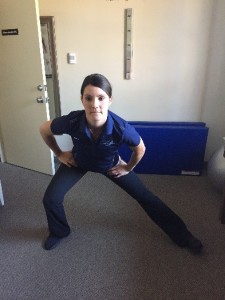
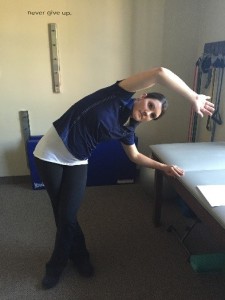
CLOCK Stretch for adductors (inside of leg): Keep one foot planted, other foot at 1:00, 2:00, 3:00 and so on.  Switch legs.

Clock 1 Clock 2Clock 3


Inside (Adductors)

Adductors


Outside (TFL, IT Band)

TFL


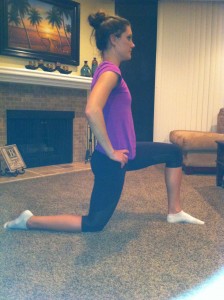
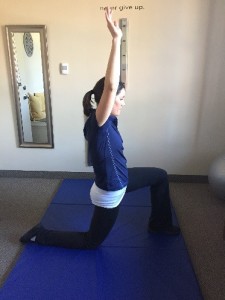
Front (psoas): Make sure back is flat, tuck buttocks, push back hip forward

Psoas 1

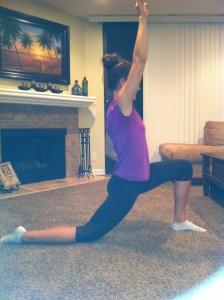
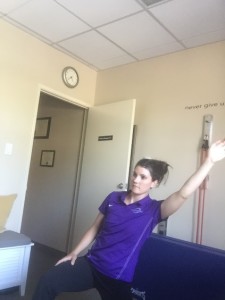
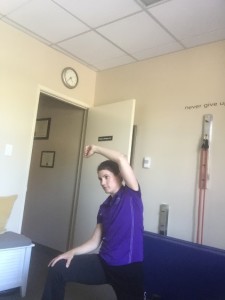
Arm up on same side as BACK leg, then lower your arm to slightly higher than shoulder height

Psoas 4 Psoas 3 Psoas 2


Sciatica? This Stretch may help…Piriformis stretch

While seated, cross one leg over the other so your heel is on the thigh of the opposite leg, with the foot on the floor, lift your heel so you’re on your toes and lean forward, keep your back tall and straight, chest to toe of the “up” leg.  Hold for 20-30 seconds, perform 3 times.

Beginning of Piriformis stretch Piriformis stretch


Neck Pain or Neck Tightness?  Try these stretches…

Scalene stretch (middle, front (anterior) and back (posterior) scalene)                                                       

Part 1: Sit or stand tall, bring right ear to right shoulder, use your right hand to provide a little more pressure, touching the right temple.  Hold for 20-30 seconds, then switch.  Perform 3 times on each side (Stretches the middle scalene)

Middle scalene

Part 2) Sit tall and bring your left ear to your left shoulder blade.  Place your left hand on the right side of your forehead to provide a deeper stretch.  Hold 20-30 seconds, then switch sides. (stretches the front (anterior) scalene)

Anterior scalene

Part 3) Sit tall, bring your left ear to the front of your right shoulder and look down, place your left hand on the back of the left side of your head and pull gently until you feel a stretch.  Hold 20-30 seconds and switch to the opposite side.  Perform 3x each side. (Back (posterior) scalene)

Posterior scalene

Sugar: Good, Bad or Both?

Healthy levels of sugar:

No more than 10% of total calories, less for someone overweight.

For most people no more than 50g of sugar should be eaten per day

Source: World Health Organization, WebMD

What may happen if you eat too much sugar:

-May gain weight: Fact: Sugar is high in calories but not very filling, making it easier to over-eat

-Can get sick more often: Fact: High levels of sugar causes a weaker immune system.

-May get old faster! Fact: High levels of sugar causes inflammation: excessive inflammation promotes aging and disease.

-Tired- After a high dose of sugar people get a dose of energy and then crash a little after.

Only if you want more detail:

-High levels of sugar suppresses release of human growth hormone: Human growth hormone helps kids grow up and adults prevent aging.

-High levels of sugar raises insulin levels; an influx of sugar quickly increases your blood sugar levels, after this your pancreas will release a lot of insulin to bring the sugar from your blood to your cells.  When you eat a lot of sugar, your pancreas can get tired and stop responding to the

high sugar levels.  Exposing your cells and organs to high insulin levels accelerates the aging process.

-Sugar promotes glycation: Once sugar molecules get into your bloodstream, they start looking for things to bind to, like protein and fat molecules.  When they attach the pair is called glycation.  These “pairs” run around crazy in your body producing toxic compounds often referred to as AGEs (advanced glycation end products)

AGE’s throw the aging process into fast-forward.

When you can have your treat:

After a vigorous workout sugar is efficiently metabolized if you are not diabetic.  Your muscles take up the sugar.  Simple sugars (ex: fruit and veggies) and protein after a workout can enhance your recovery.

Energy Drinks Can Be Lethal

This is a summary of :

Medscape Medical News: “Energy Drinks Pose Serious Health Risks for Young People.” Pediatrics.2011; 127:511-528. 


The recommended US FDA limit of caffeine is 71mg per 12 fluid oz maximum. Energy drinks contain between 50mg-505mg per can or bottle, and get away with it because they are classified as nutritional supplements.  Additional caffeine is not included in the calculation, which comes from adhesives such as guarana, kola nut, yerba mate, and cocoa.

30-50% of teens and young adults drink energy drinks.  Of the 5,448 US caffeine overdoses 46% occured in those younger than 19.  Children should have no more than 2.5 mg/kg per day and adolescents should have no more than 100mg/day.

In other countries, energy drinks have been reported to have caused liver damage, kidney failure, respiratory disorders, agitation, confusion, seizures, psychotic conditions, nausea, vomiting, abdominal pain, rhabdomyolysis (skeletal muscle break down), tachycardia (fast heart beat), cardiac dysrhythmias (irregular heartbeats), hypertension, myocardial infarction (heart attack), heart failure and death.

Other ingredients in energy drinks are not well researched and have possible drug interactions, including in contacts with alcohol.

Caffeine in energy drinks may also interfere with bone mineralization during a critical period of skeletal development. 


***To prevent your need for caffeine: Sleep 7-9 hours per night, eat a balanced diet full of green leafy vegetables, drink water (at least half your weight in oz per day, more if you exercise or drink any caffeine) and exercise regularly!


Recipes

Crock Pot Rosemary Chicken

Chicken thighs

Olive Oil

Salt and Pepper

Rosemary

Cook 4-6 hours


Crock Pot Herb Chicken

3-4 lbs chicken thighs

Coat on both sides with olive oil

Sprinkle evenly with:

Terragon

Tumeric

Oregano

Cayenne

Garlic powder

Onion powder

Salt

(A tiny bit of sage)

Cook 4-6 hours

Source: Saladmaster cook book


Crock Pot Hawaiian Chicken with Quinoa

3-4 lbs. chicken thighs

1/2 cup honey

1/3 cup Braggs Liquid Aminos (healthier soy sauce…you can find this at Sprouts or Whole Foods)

1, 15 oz can pineapple tidbits in juice

1 onion sliced

1 red pepper (optional)

1 green pepper (optional)

Grease the bottom of the crock pot with Olive Oil. Place Chicken in crock pot and add honey, Braggs and pineapple juice (not the tidbits yet). Add tidbits, onion and peppers about 3 hours after starting to cook. Cook 6-8 hours on low.

Use about 1 cup of the juice and 1 cup of water in a pan to cook 1 cup of Quinoa

Source: Barb Gustafson


Crock Pot Mexican Ground Turkey

2lbs ground turkey

1 clove garlic, minced

1/4 tsp. pepper

1/2 tsp. salt

1 tbs. chili powder

1 tbs. mustard

1 onion, chopped

Grease crock pot with Olive Oil, mix ingredients well and let cook for 4-6 hours. You can use this with Ezekiel tortillas, eggs and salsa for a breakfast burrito, add beans and olives for a regular burrito or as a dip with blue corn chips! I like fresh and easy’s fresh pico de gallo salsa.

Source: Crockery Cookery by Mable Hoffman


Crock Pot White Bean Chile

1lb northern beans
6 c chicken broth
4 cloves minced garlic
2 medium onions chopped
1T olive oil
2, 4oz cans green chiles
2 t cumin
1 1/2 t dried oregano
1/4 t cayenne pepper
2 t salt
4 c cooked chicken
Jack cheese (optional)

Soak beans overnight, drain the next morning. Cook all ingredients for about 6 hours on low. (Taste test and cook longer if needed). Add cooked chicken and cheese (optional) right before serving.

Source: Barb Gustafson


Curry Chicken

~3 lbs chicken thighs

1 Tsp Curry Powder

1 Tsp Garlic Powder

1 can of coconut milk

Let marinate in a bowl overnight, and fry both sides for ~6 min each.


Grilled Turkey Burgers

1 1/2 lb lean ground turkey

1 tsp garlic powder

3/4 tsp ground cumin

1/4 tsp pepper

1/4 tsp salt

1/2 tsp olive oil

Combine all ingredients in a bowl and mix well. Form mixture into patties of desired size. (up to 6 equal sized smaller patties)

Grill each for 4-5 min. per side

Top with avocado or use ketchup (whole foods or trader joe’s have healthier options)


Grilled Chicken Kabobs

3 Tbs olive oil

Zest and juice of 1 lemon

3 cloves minced garlic

1 Tbs salt

1/2 tsp pepper

1 pound chicken thighs, cut into 3/4 inch pieces in a medium bowl

Mix all together and let marinate for 2-8 hours.

Use skeweres (soak 20 min prior with wooden skewers) and cut pepper and onions alternating chicken, onion, pepper, chicken etc

Grill on each side for 8-12 min.

YUMMMMMM

Source: Standard Process 21 day cleanse book


Egg Casserole

2 small sweet potatoes (make into hashbrowns, I use the Saladmaster Machine)

15 eggs beat and mixed with…

1 tsp onion powder

1/4 tsp garlic powder

1 tsp cumin

salt and pepper

Ground turkey

Salsa

Bake 1 hour at 350 degrees

I use my crock pot A LOT, but for everything else, I use Saladmaster pans
and I love their “Saladmaster” device, perfect for making salads and shreading carrots, beats, etc as well as making sweet potato fries.
They are the best pans I have found, for not leaching toxins into your food.
Core Bracing: Suck in or Push out?

If you’ve taken exercise classes or watched exercise videos, you may have heard people tell you to “suck in your core to protect your spine.”  Another phrase often said in lifting when referring to bracing is, “push out to activate your core.” These terms can be confusing.  The goal of core bracing is to allow your body to function efficiently and powerfully, but only core bracing correctly allows this to occur.

The first thing to understand is what muscles are included in the core.  The core includes more than just the abs (transverse abdominus, internal oblique and external oblique).  Also included are the gluteus maximus, diaphragm, pelvic floor muscles, erector spinae, latissimus dorsi and trapezius (middle and lower especially) and I would argue the deep neck flexors.  If these muscles are all activated at once, the entire spine is protected.

Suck in Vs. Brace

The “suck in” method (aka hollowing or the draw in method) is often taught in pilates and various other workouts, viewed to “protect the spine.” However, the suck in method reduces the size of the base, activating only the transverse abdominus.  One muscle is not meant to support the spine by itself.  Stability for moving loads cannot come from the draw-in technique.  Mechanically, it is almost impossible for contraction and depression of the ribs, making it difficult to breathe.  Drawing in compresses the spine and increases the possibility of instability.

Bracing (sometimes referred to as “pushing out”) should be viewed more as tightening or activating the entire core at once. To brace means to give support, to make stronger or firmer. It can be viewed as guy wires, enhancing stability.  The muscles activated are the external oblique, internal oblique, transverse abdominus, rectus abdominus, diaphragm, multifidus, pelvic floor and deep neck flexors.

How to Brace:

Plank is a great example of bracing the core.  Tightening the muscles surrounding the spine while the spine is in neutral can be done even while sitting.  It is important to train yourself to breathe with the diaphragm while bracing, ideally all throughout the day.

In conclusion, we should not be saying “suck in” or “push out.”  Tightening the core gives greater protection to the spine than trying to activate specific muscles individually.  Therefore, the plank exercise, especially in a progression form is one of the best core exercises for improving function, posture and stability.  Core strength also prevents injury to the spine and improves sport performance.

Dr. Rebecca Bomgaars D.C. CSCS

Sources:

Maeo S, Takahashi T. Trunk muscle activities during abdominal bracing: comparison among muscles and exercises.  J Sports Sci Med. 2013 Sep 1; 12(3): 467-74.

MgGill S.  Ultimate Back Fitness and Performance.  2004; 5, 168-172.